How to build hojo-undo tools #2: Sashi-Ishi
/This is the second in a series of blogs I am writing about how to build hojo-undo training tools (the first, about how to build chi’ishi, can be found here).
I must start again by giving credit to PJ Turnbull for building all of the tools in this series - without his skills and innovation, none of this would have been possible!
We will look below at how to make sashi-ishi.
Sashi-ishi (差し石) shares the same meaning as ‘a stone with something put in it’ (although it uses different kanji), but, as Ei’ichi Miyazato-sensei explains in this video, it actually means ‘stone that you lift up’ (‘Sashi’ is an abbreviation of ‘sashi-ageru’ (差し上げる), meaning ‘to lift up’). Sashi-ishi are often overlooked in Western dojos as a training tool, but are important kigu used to train the arms, lats, legs, and groin muscles.
A video of Gima Tetsu-sensei using the sashi-ishi at the Jundokan can be found here.


I will explain how to make two different types of sashi-ishi below.
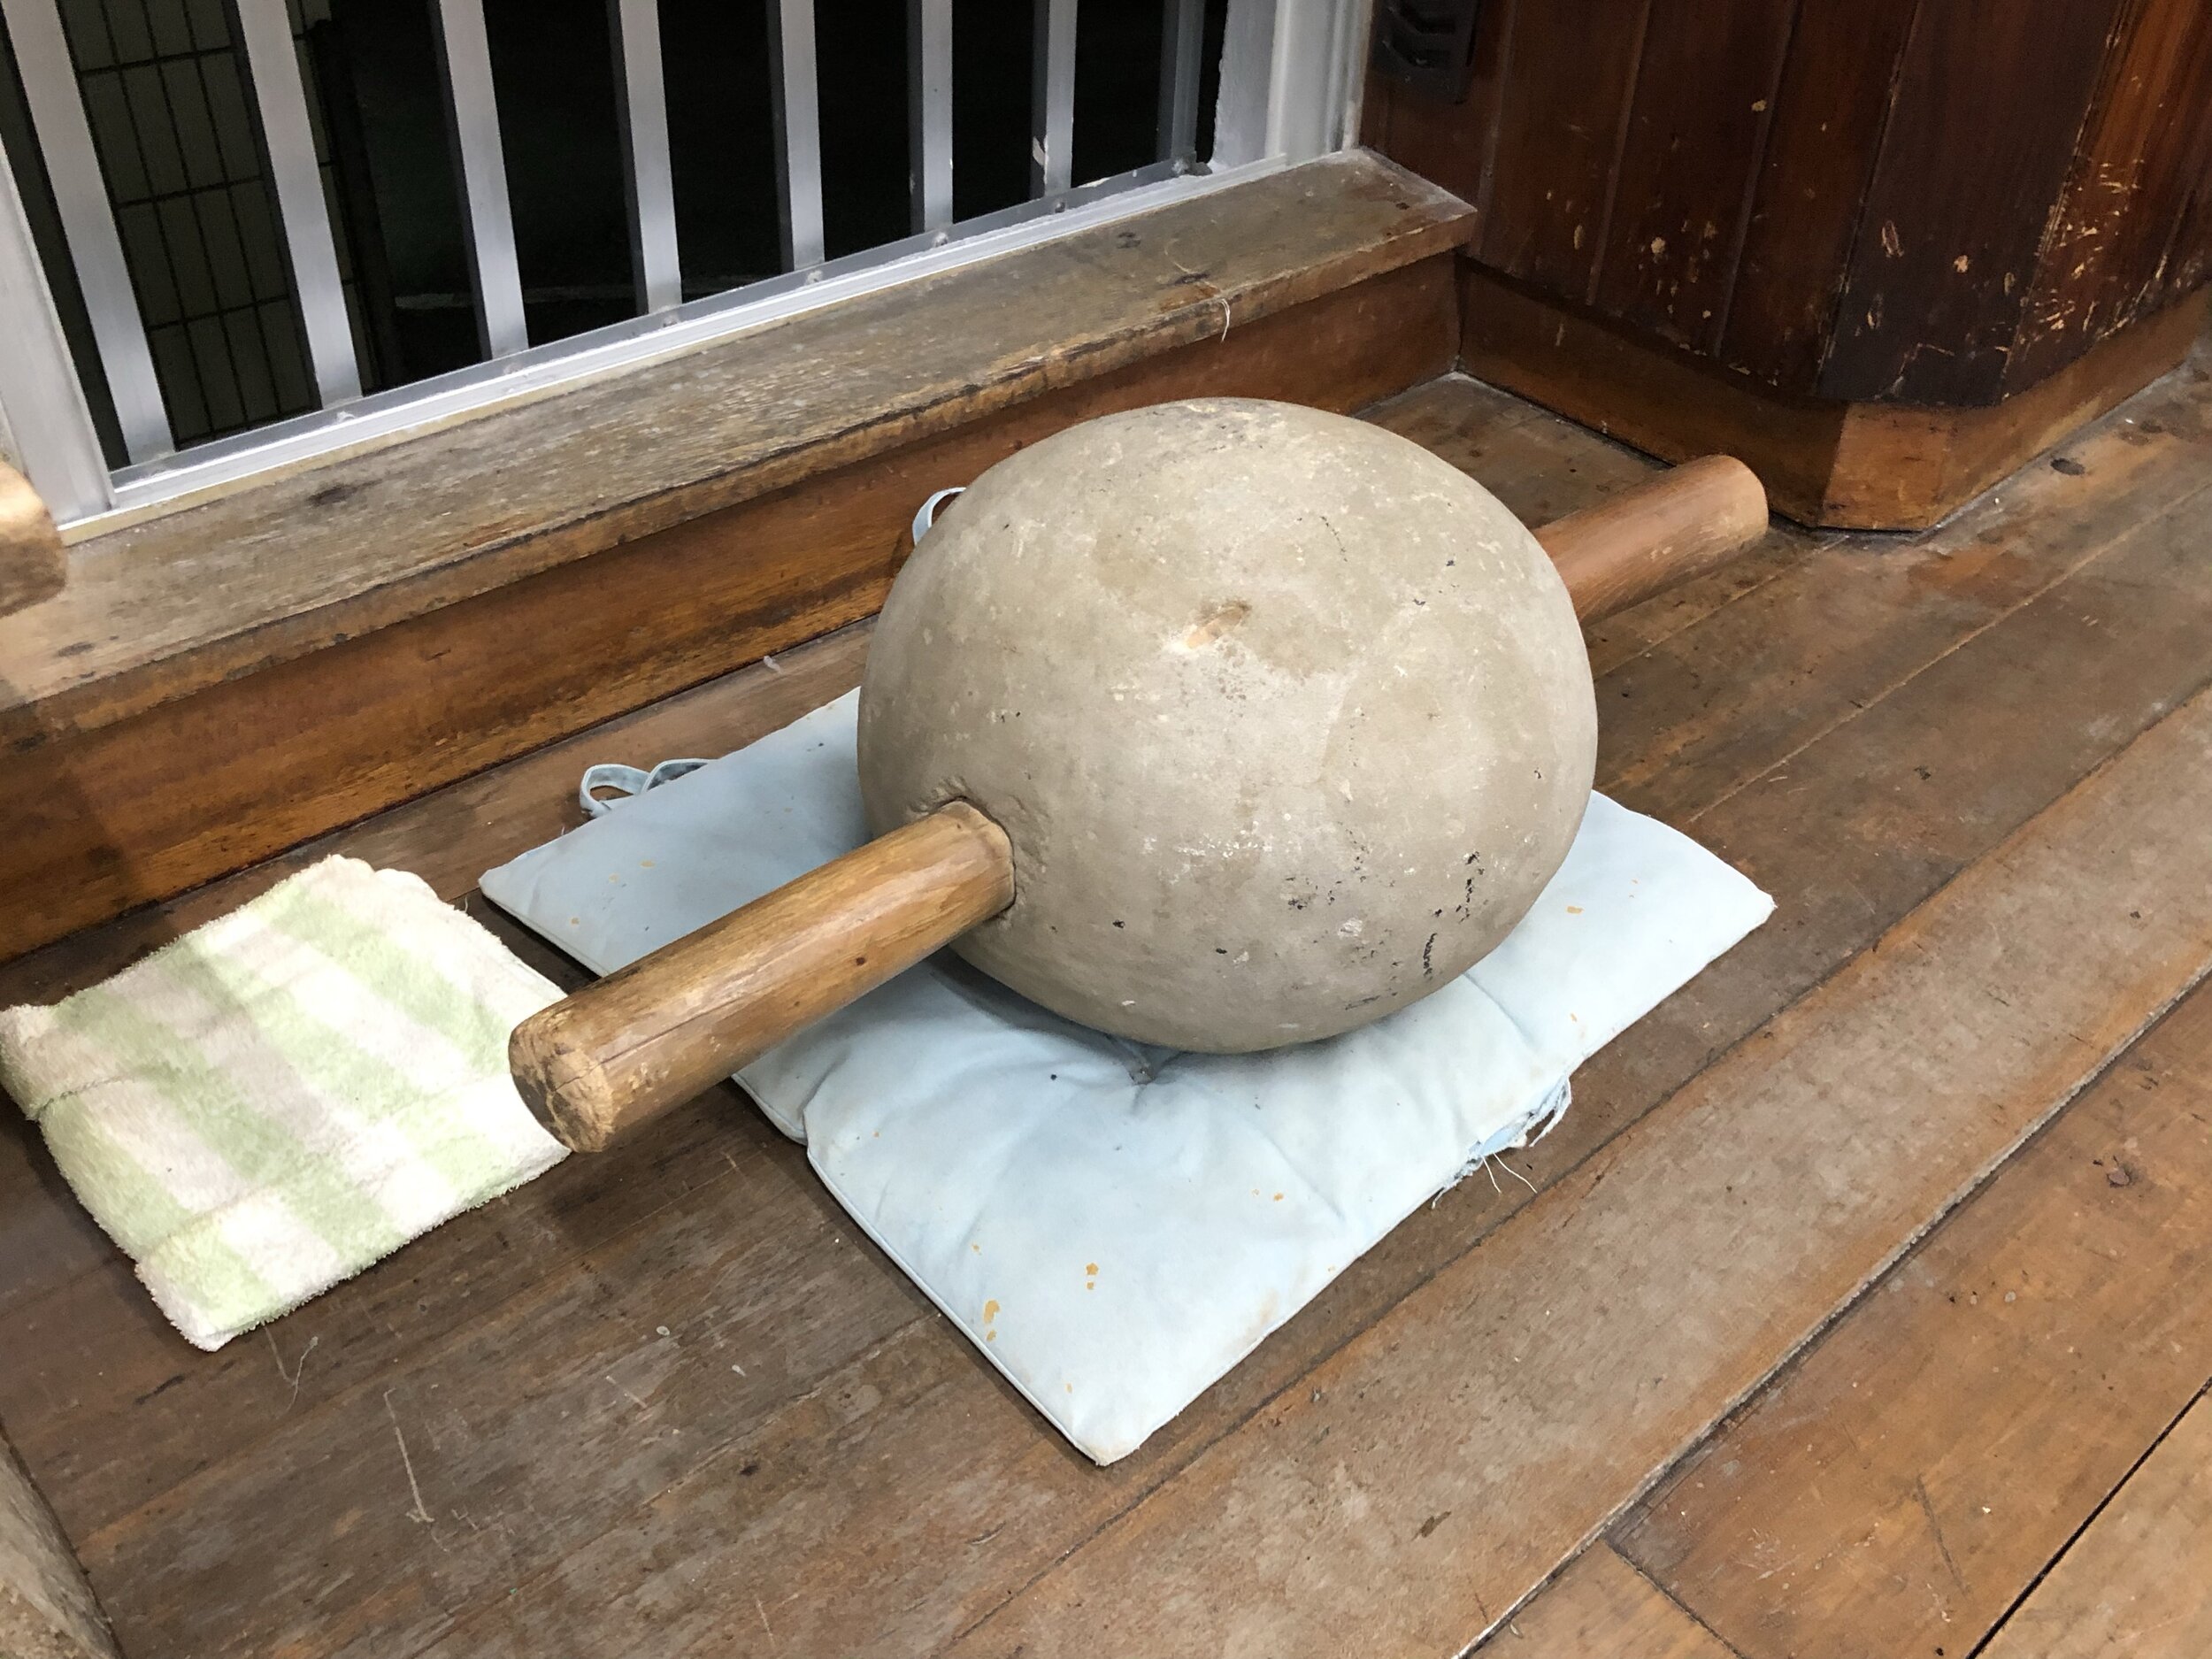
Type 1: Concrete Ball
Materials:
Solid wooden pole (25–30mm thick, 550mm long)
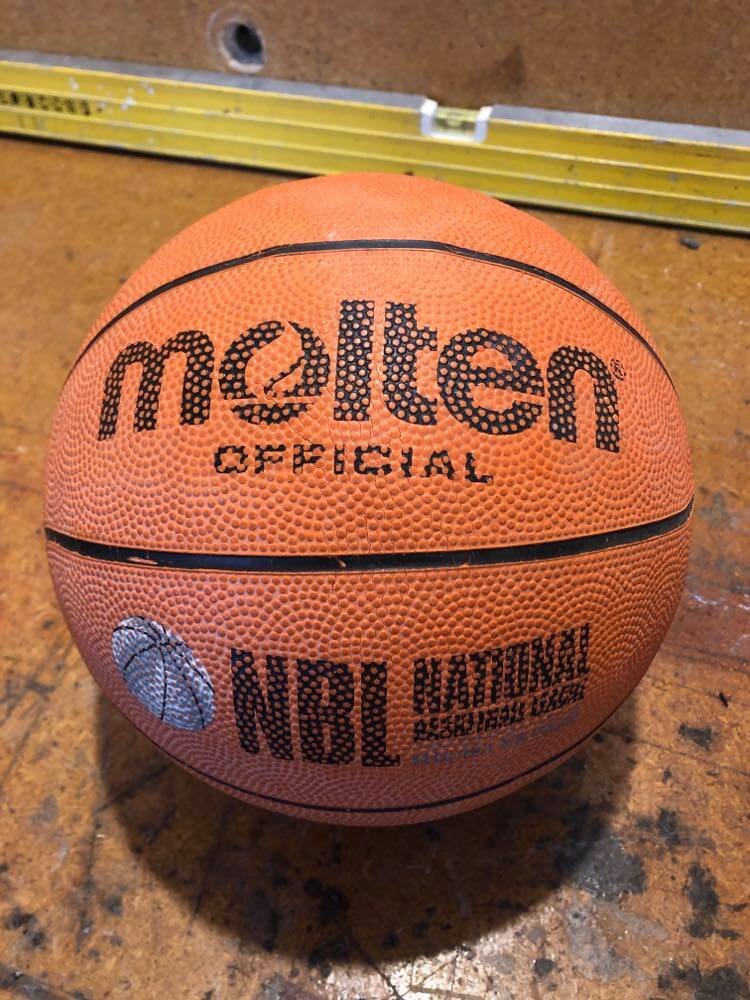
Old basketball
Concrete
Sandbox
Method
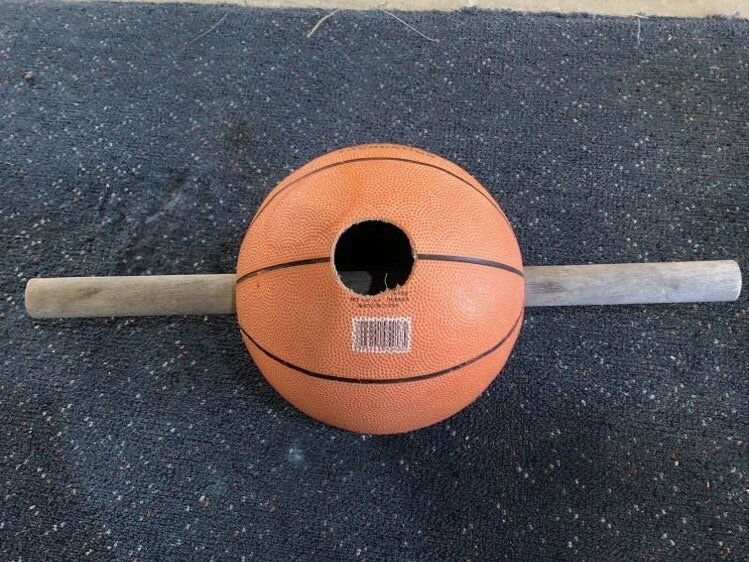
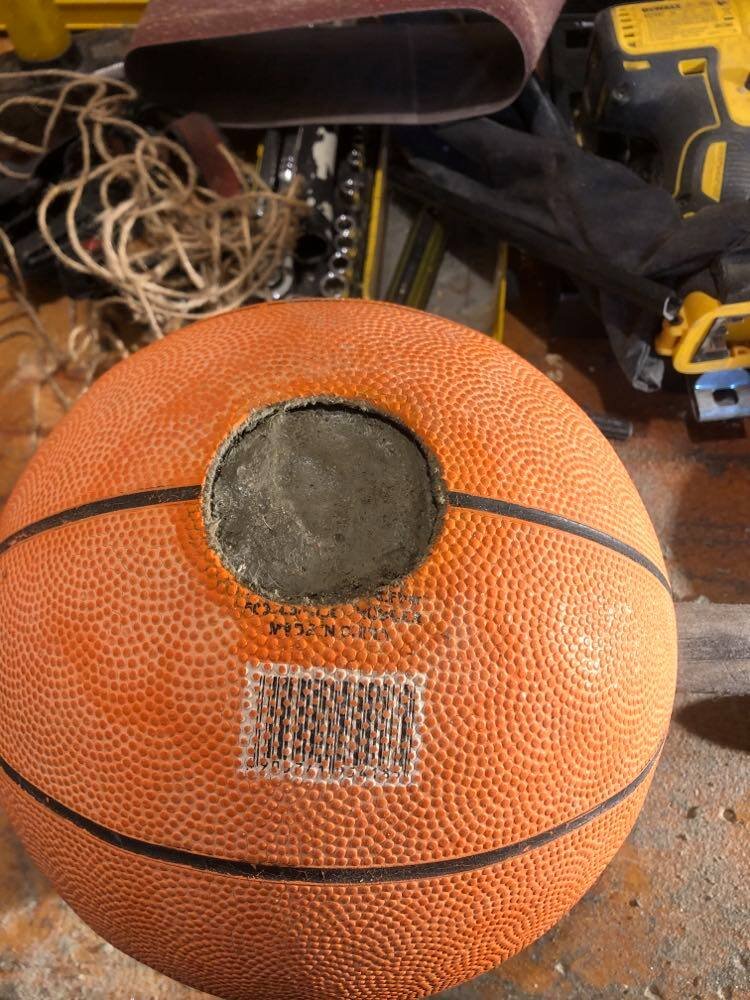
① Start with an old basketball (or a ball of similar size) that you no longer need (as it will get destroyed in the process).
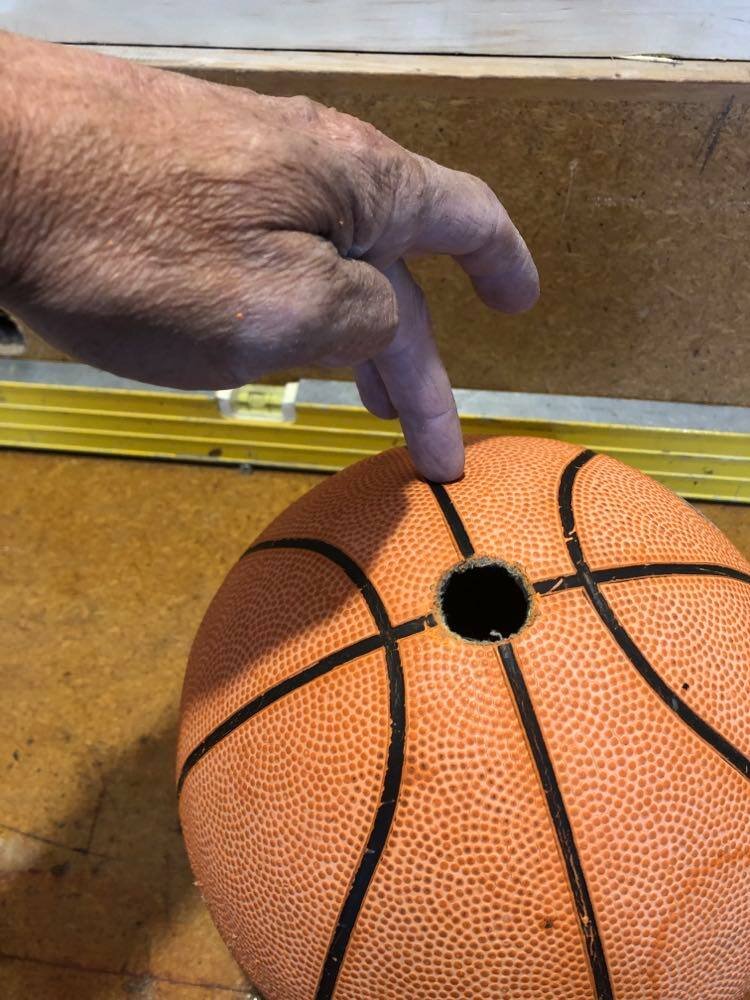
② Cut a hole in the top of the basketball which will be used to fill the ball with concrete. Remember: don’t cut the hole too big as this will inevitably leave a flat part in the ball, although this can come in handy later on to keep the sashi-ishi from moving when placed on the ground.
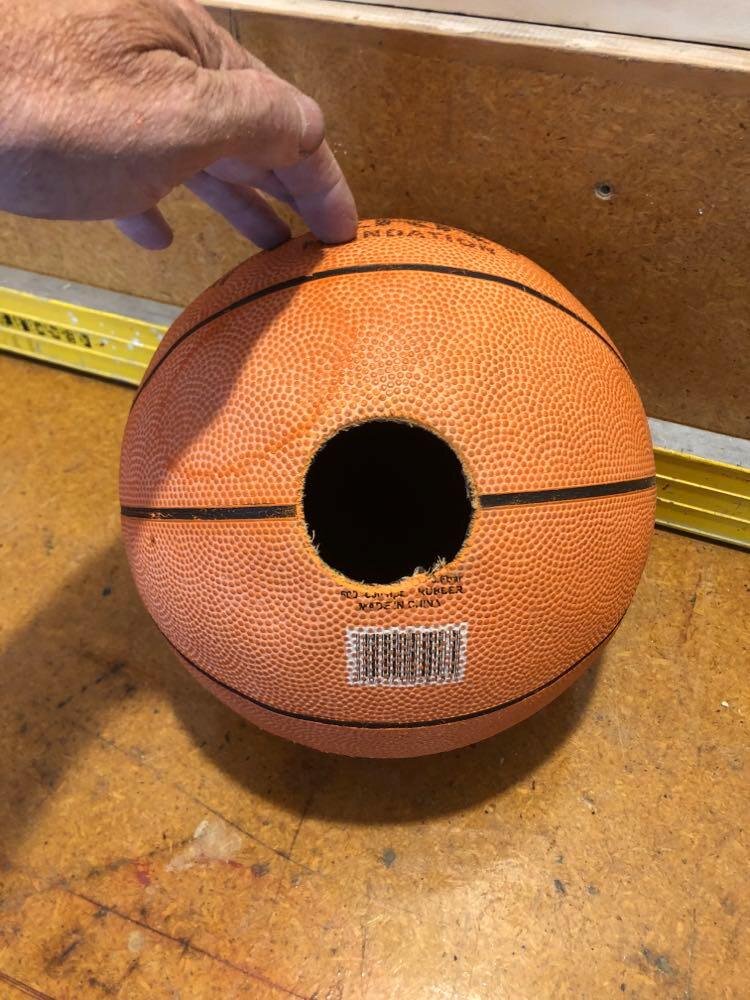
③ Cut holes in either side of the ball directly opposite each other. These are the holes through which your pole will be thread, so it must be the same size as your pole is thick (usually around 25–30mm).
④ Insert the pole into the ball so that it comes out the hole on the other side.
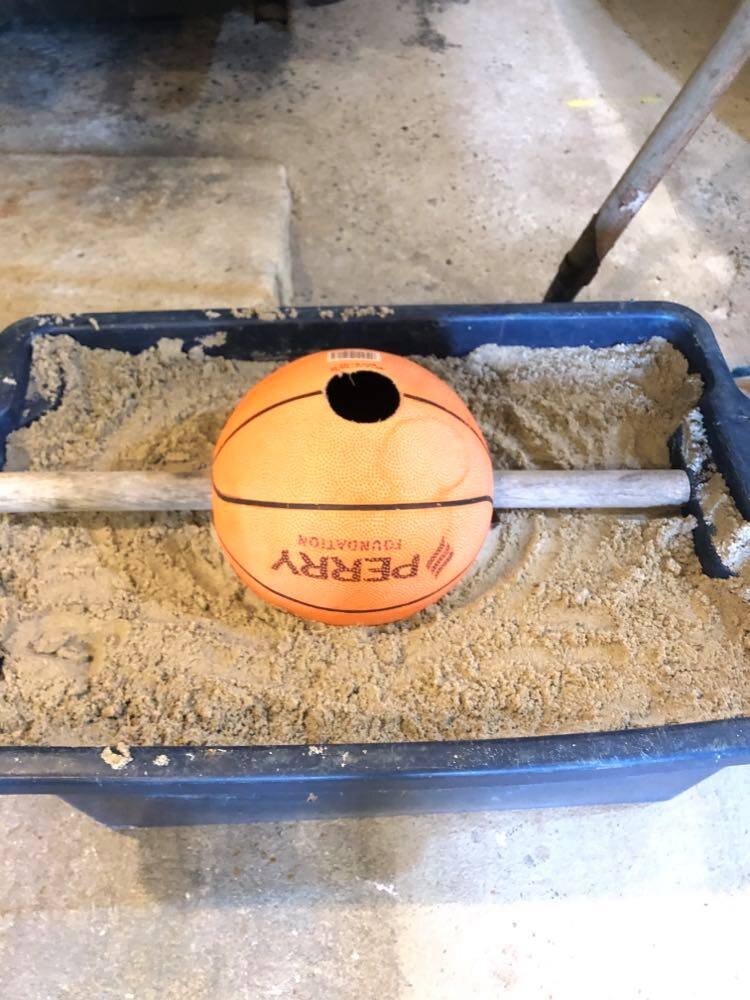
⑤ In your sandbox, make a mould into which you will place your basketball.
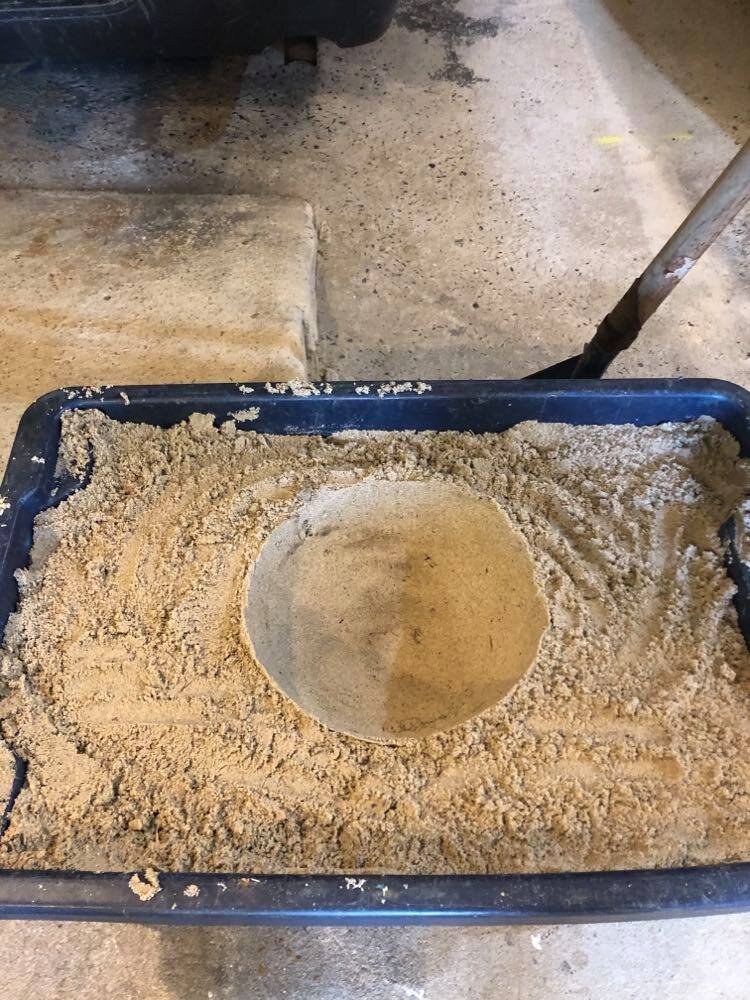
The point of the sandbox mould is to cradle the ball while the concrete dries so that it does not end up with a flat bottom like it would if placed on a solid surface.
⑥ Mix the concrete according to the instructions on the bag, and carefully pour it into the ball through the hole you created in step ②.
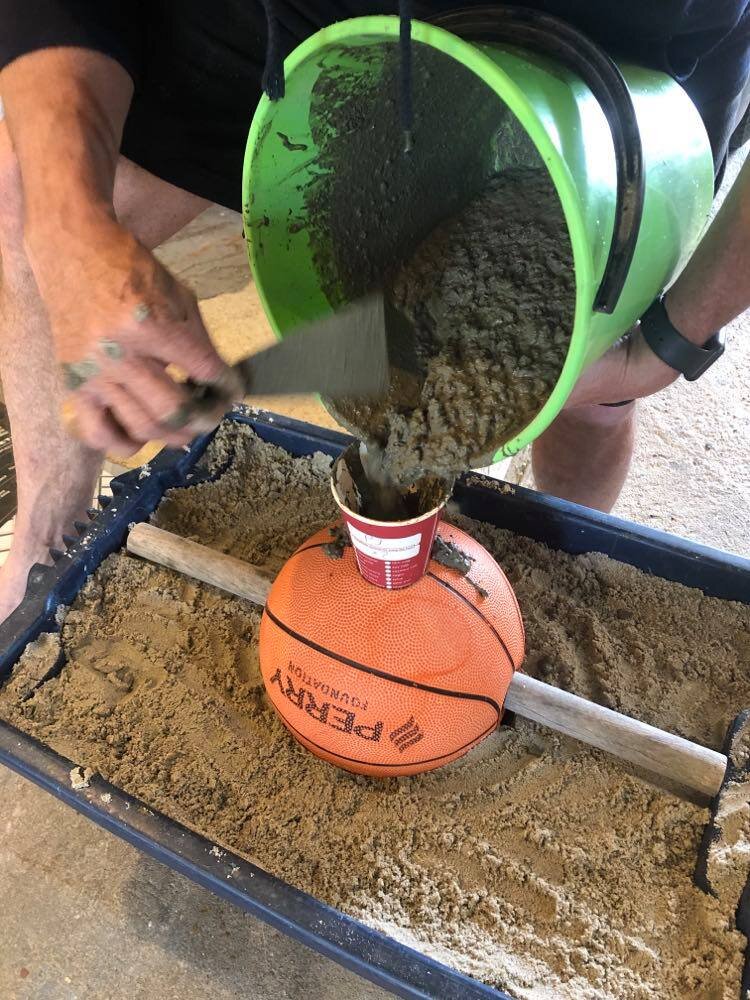
It may be easier to use an old cup or something similar to help funnel the concrete into the ball, as in the photo above.
⑦ Leave to dry over night (24–48 hours)
⑧ Cut away the basketball cover to reveal your complete sashi-ishi concrete ball.
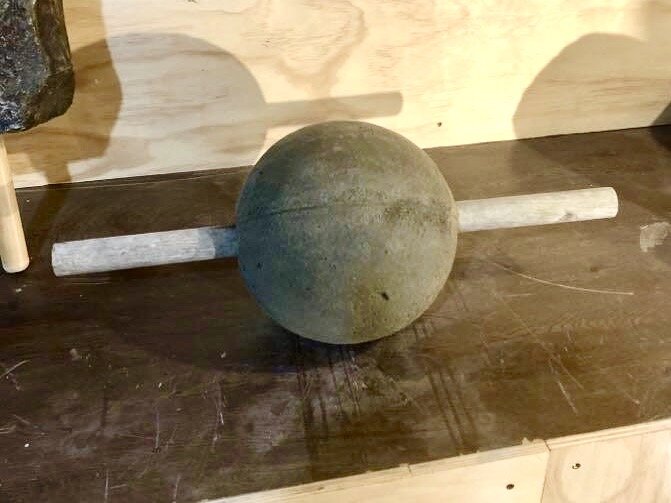
⑨ Smooth off any rough parts left behind from the pattern of the ball.
⑩ For an added (optional) aesthetic touch, place some rope at the base of the pole where it meets the concrete ball, and hold it in place with glue or silicone

⑪ Start training.
Note: This final product weighed approximately 12kg, so if you would like something heavier, you may wish to add extra weight (stones etc.) inside the ball whilst pouring your concrete.
Type 2: Rock
Materials:
Large rock
Metal rod (approx. 12mm thick) - (this one was aluminium and hollow)
Solid wooden pole (25–30mm thick, 160mm long) x2
Silicone
Method:
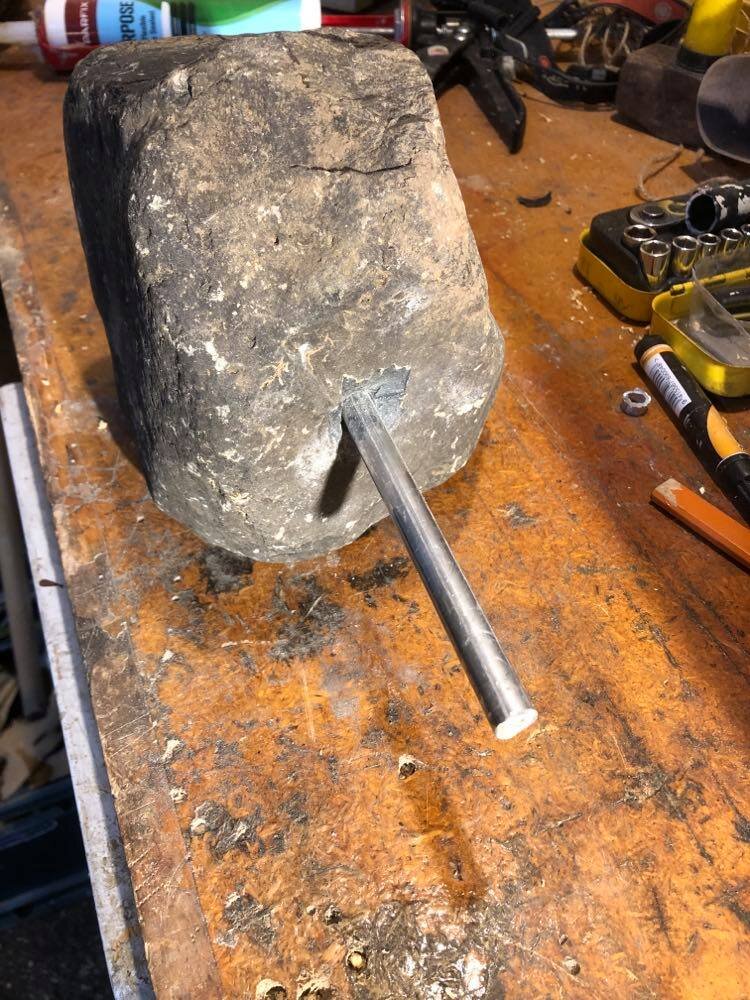
① You must start by finding a suitable rock. Check to ensure that it is the correct weight (for reference, the sashi-ishi in the Jundokan is about 20kg, but anything from 10-15kg will be fine), correct size, and of an evenly-balanced shape.
② Take your large rock and drill a hole with a dynadrill through the centre of it the same width as your metal rod.

③ Insert the metal rod and fix in place with silicone for security.
④ Drill a hole in your wooden pole the same width as the metal rod.
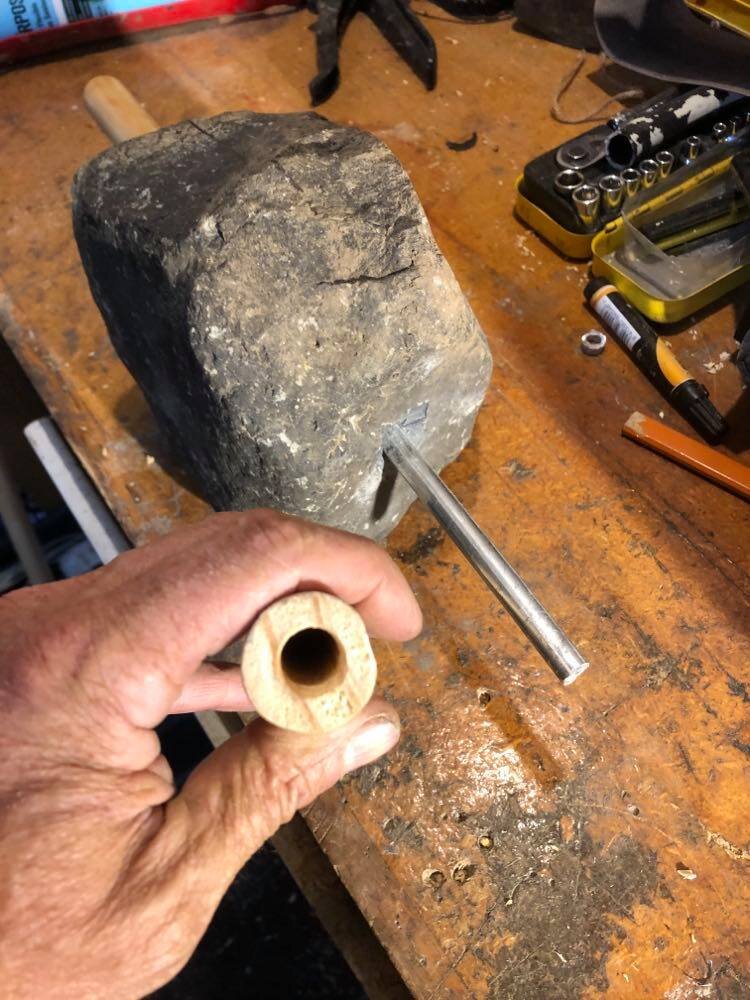
Make sure you do not drill the entire way through - stop just before the end.
⑤ Slide the wooden poles over the steel rod on either end of the stone, and hold in place with silicone.
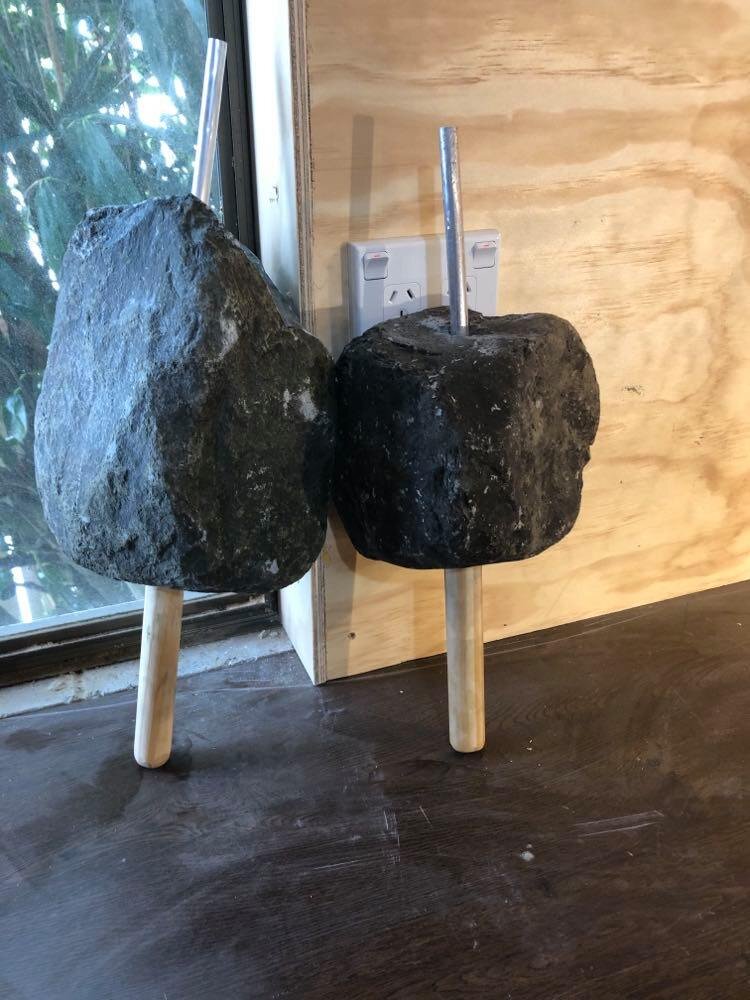
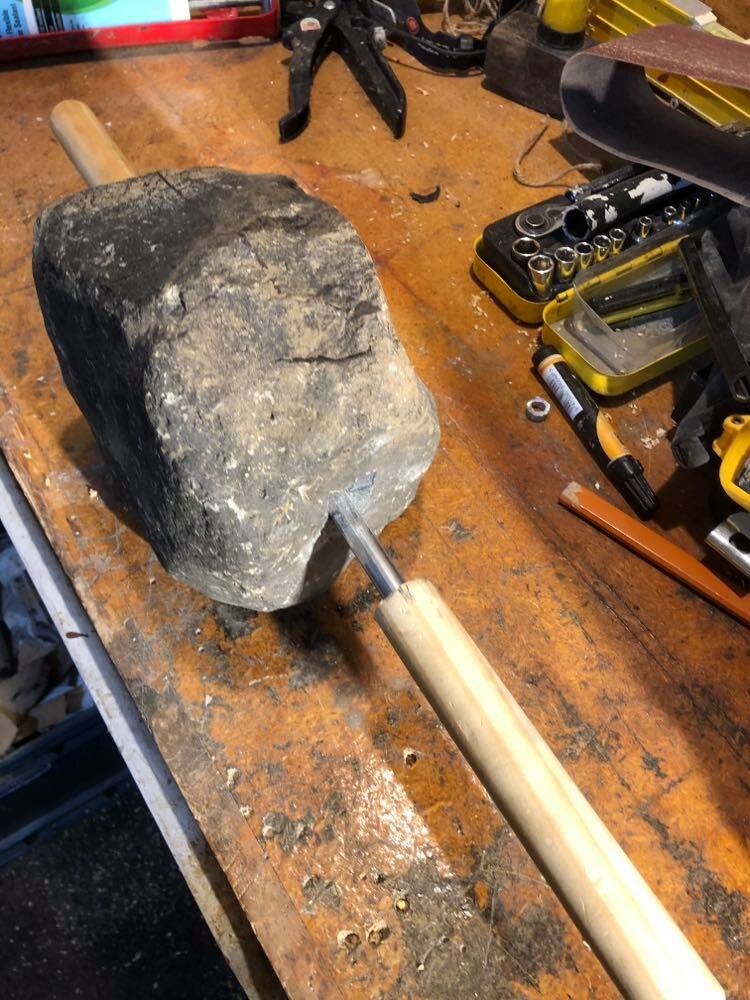
Note: It is best to try shaping the wooden handles to the surface of the rock to avoid having any gaps when they join (also see step ⑦ below).
⑥ Allow to dry over night (24 hours)

⑦ Particularly as the rock may not have an even surface, it is a good idea to add rope to where the wooden pole meets the rock to help cover the join with glue or silicone (purely aesthetic!).
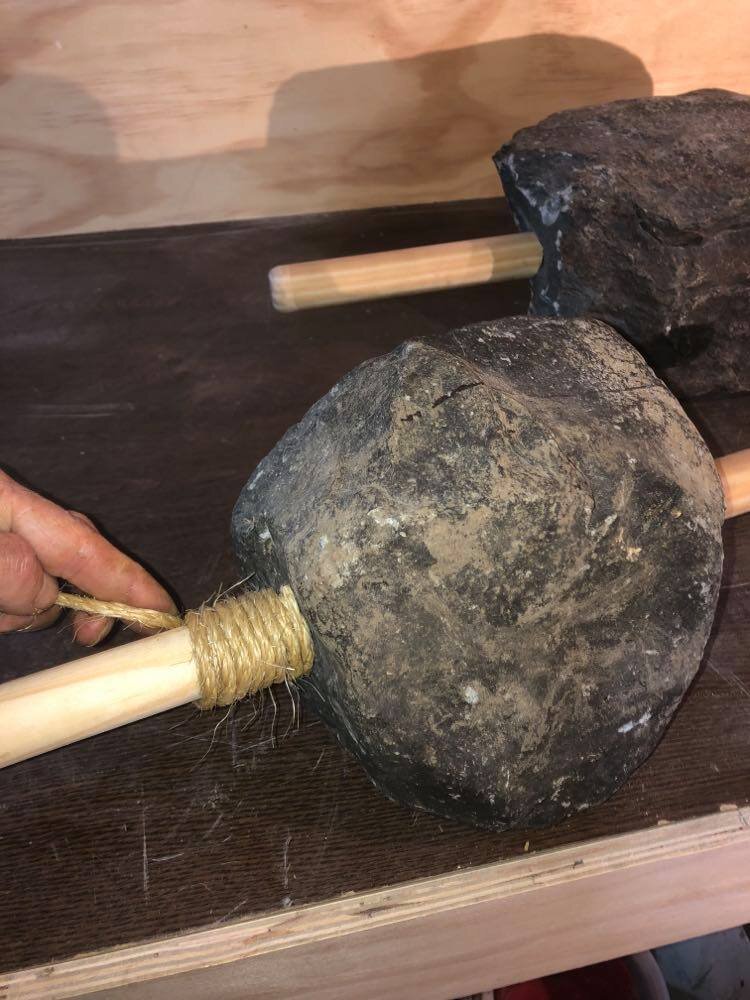
⑧ Start training.