How to build hojo-undo tools #3: Ishi-sashi
/This is the third in a series of blogs I am writing about how to build hojo-undo training tools (you can find the first two here: chi’ishi and sashi-ishi).
I must start again by giving credit to PJ Turnbull for building all of the tools in this series - without his skills and innovation, none of this would have been possible!
Ishi-sashi (石錠, meaning, ‘stone padlock’), also sometimes known simply as ‘sashi’, are a stone or concrete hand weight, similar to the modern kettlebell. They are used to help develop hand, wrist, arm and shoulder strength

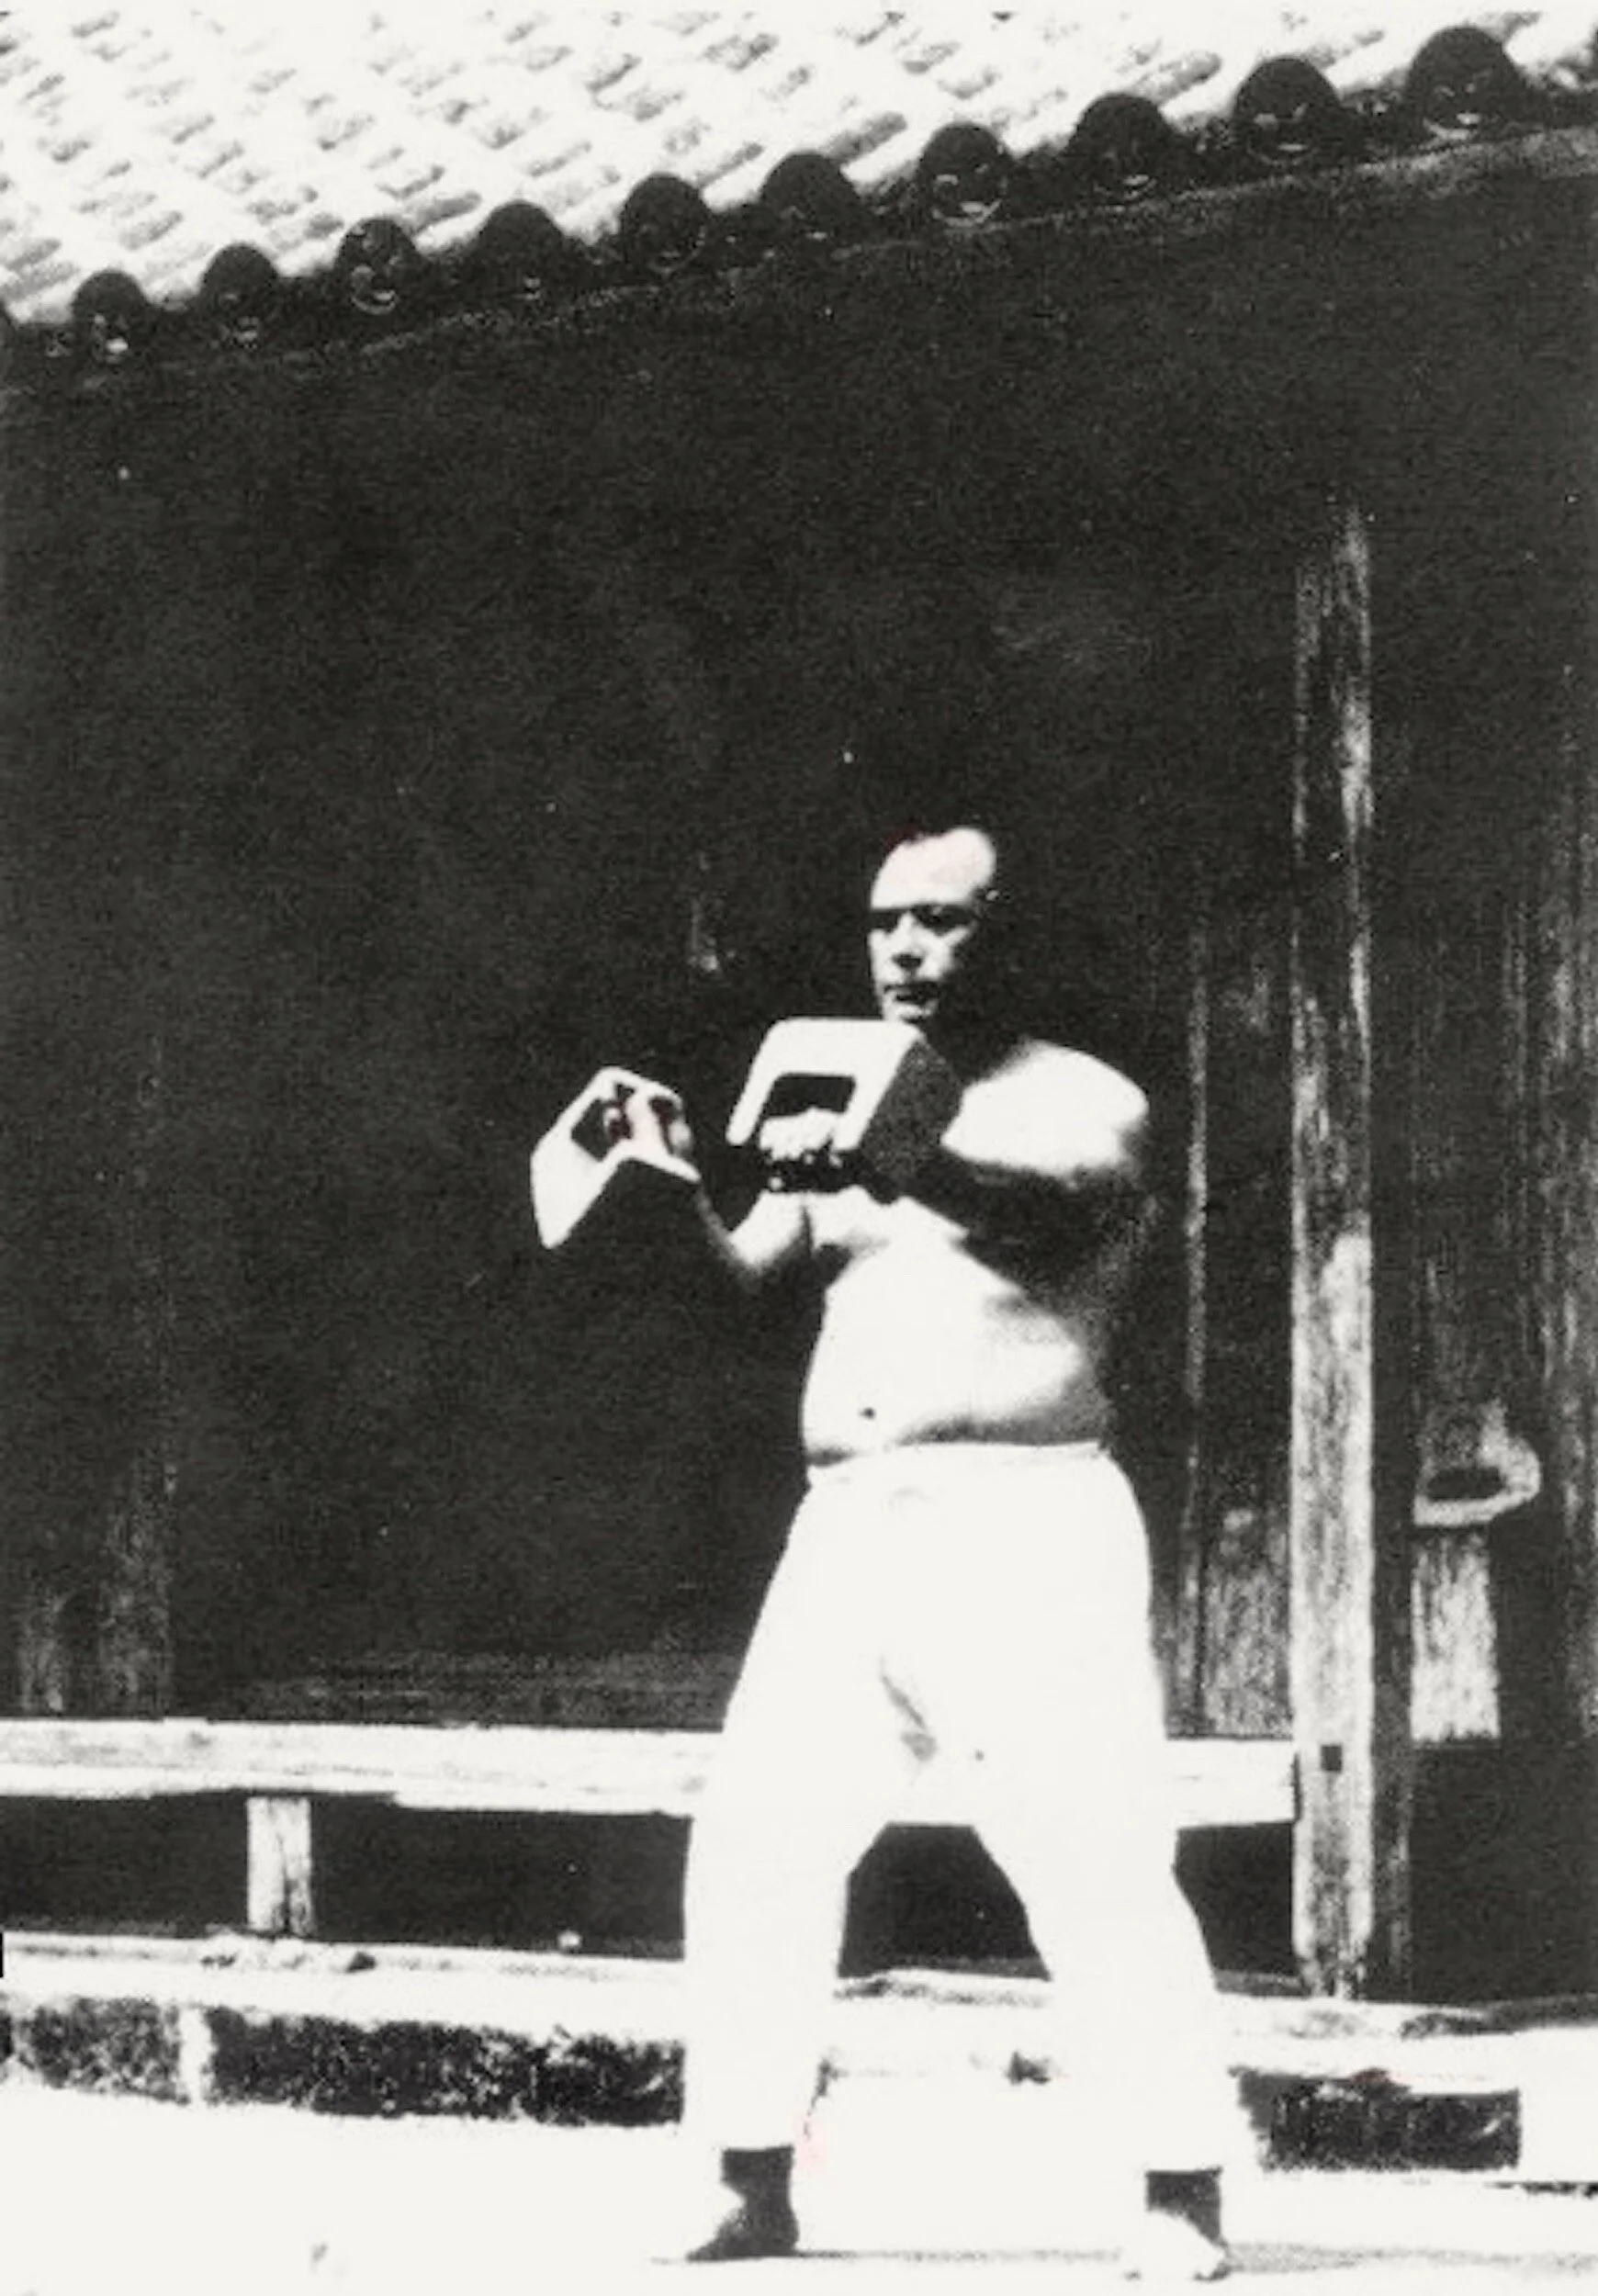
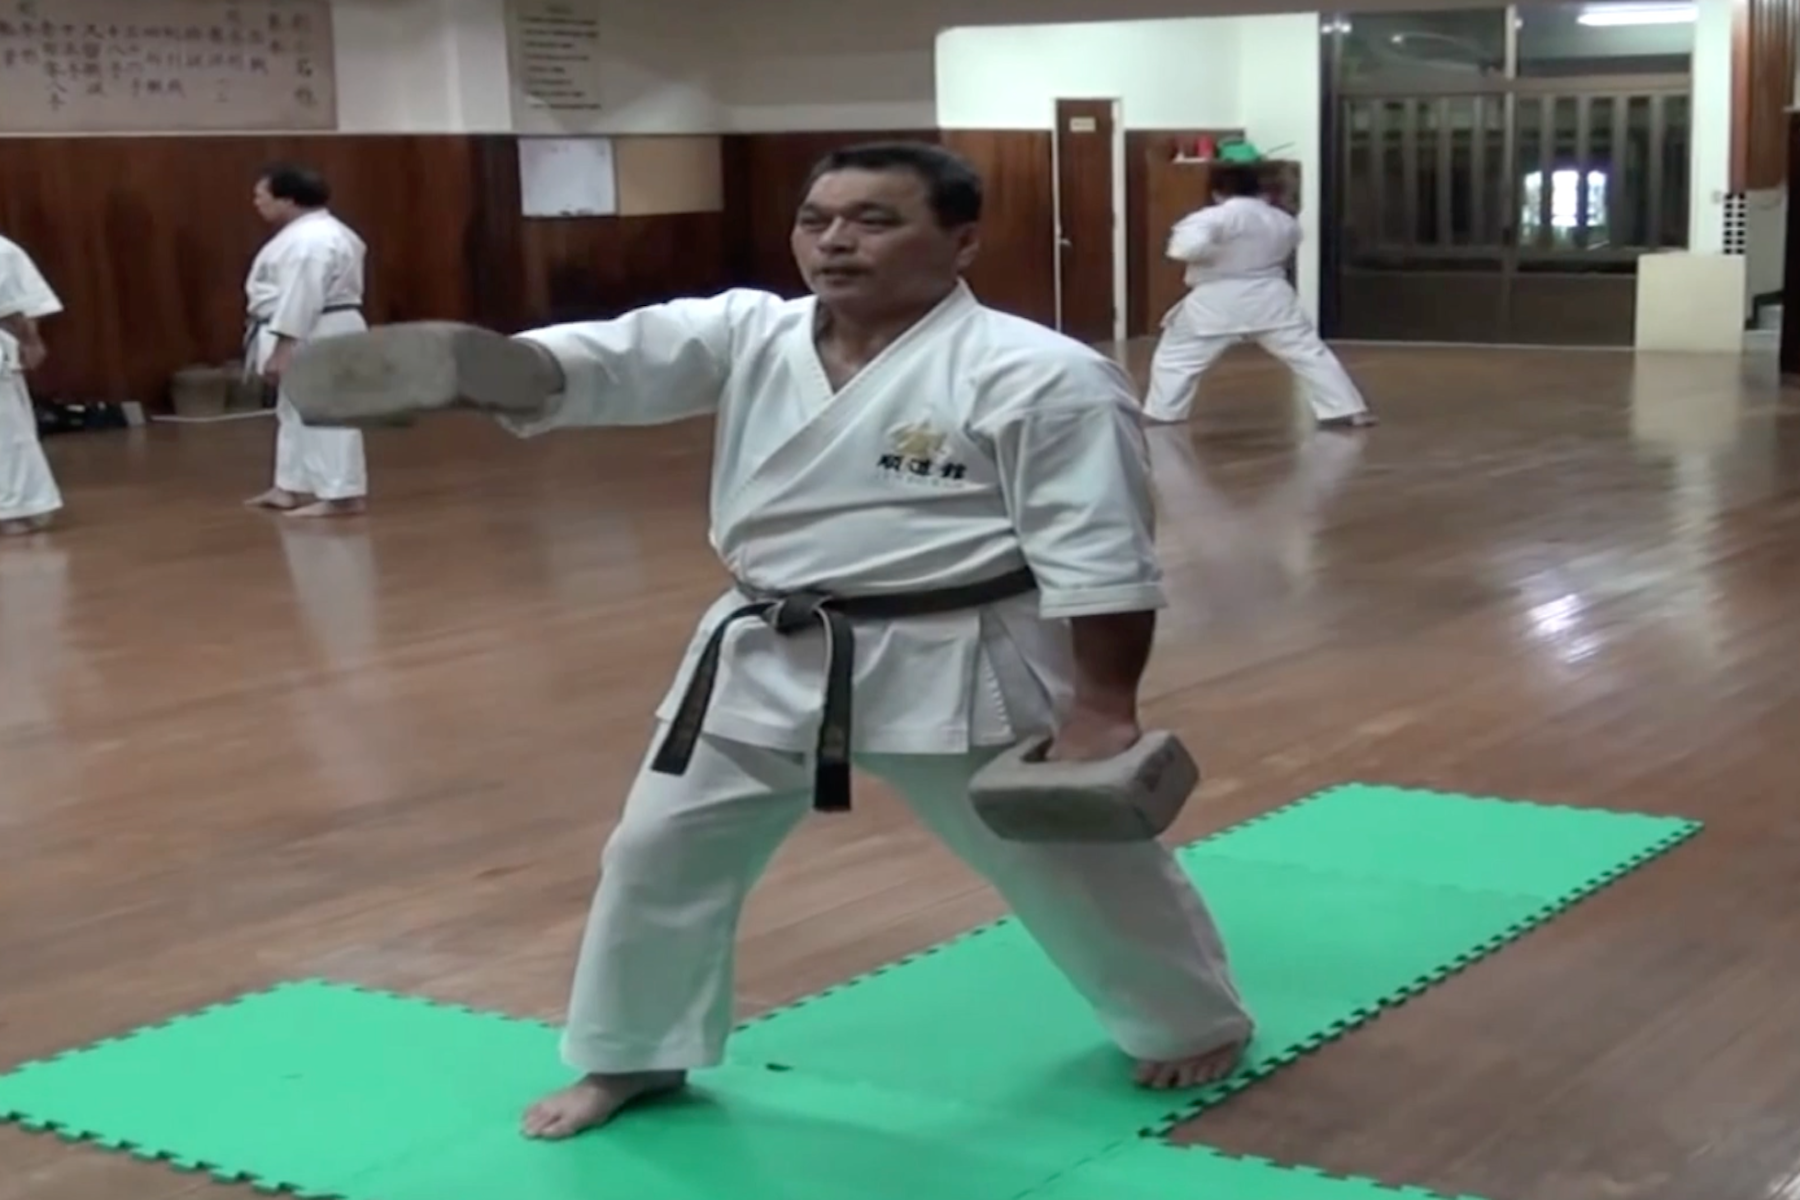
A video of Gima-sensei using ishi-sashi at the Jundokan can be found here.
I will explain, step-by-step, how to make ishi-sashi below.
Materials:
12mm ply-wood (see below for cut-out shapes)
Solid wooden pole (25–30mm thick, 200mm long)
Cement
Screws (or nails)
Wire

Method:
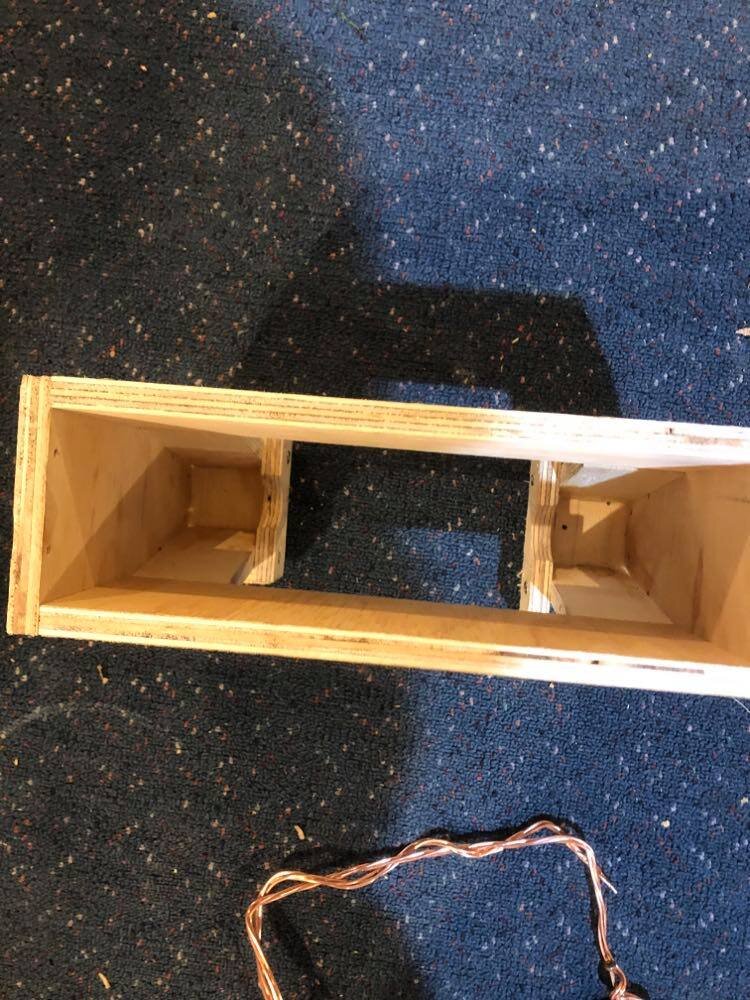
① Start by cutting the wood into the necessary shapes and sizes shown in the materials section above.
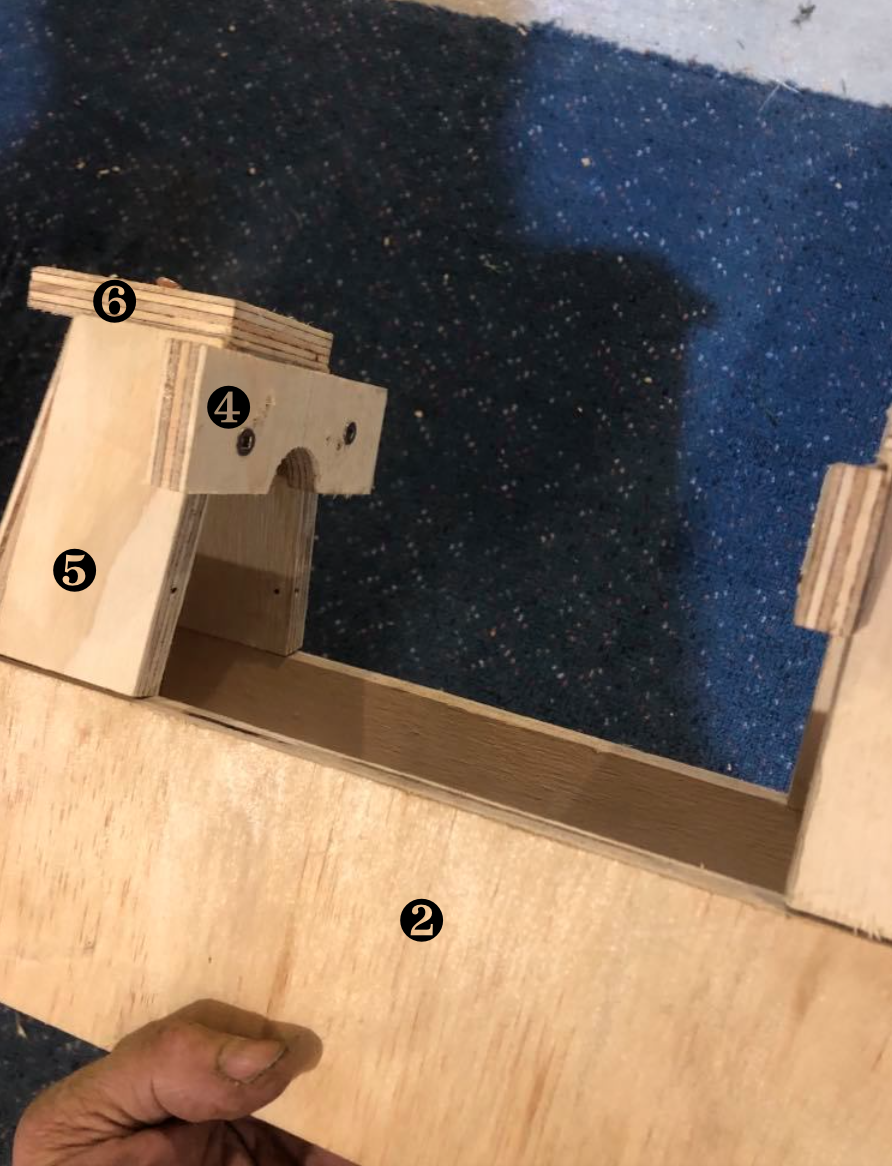
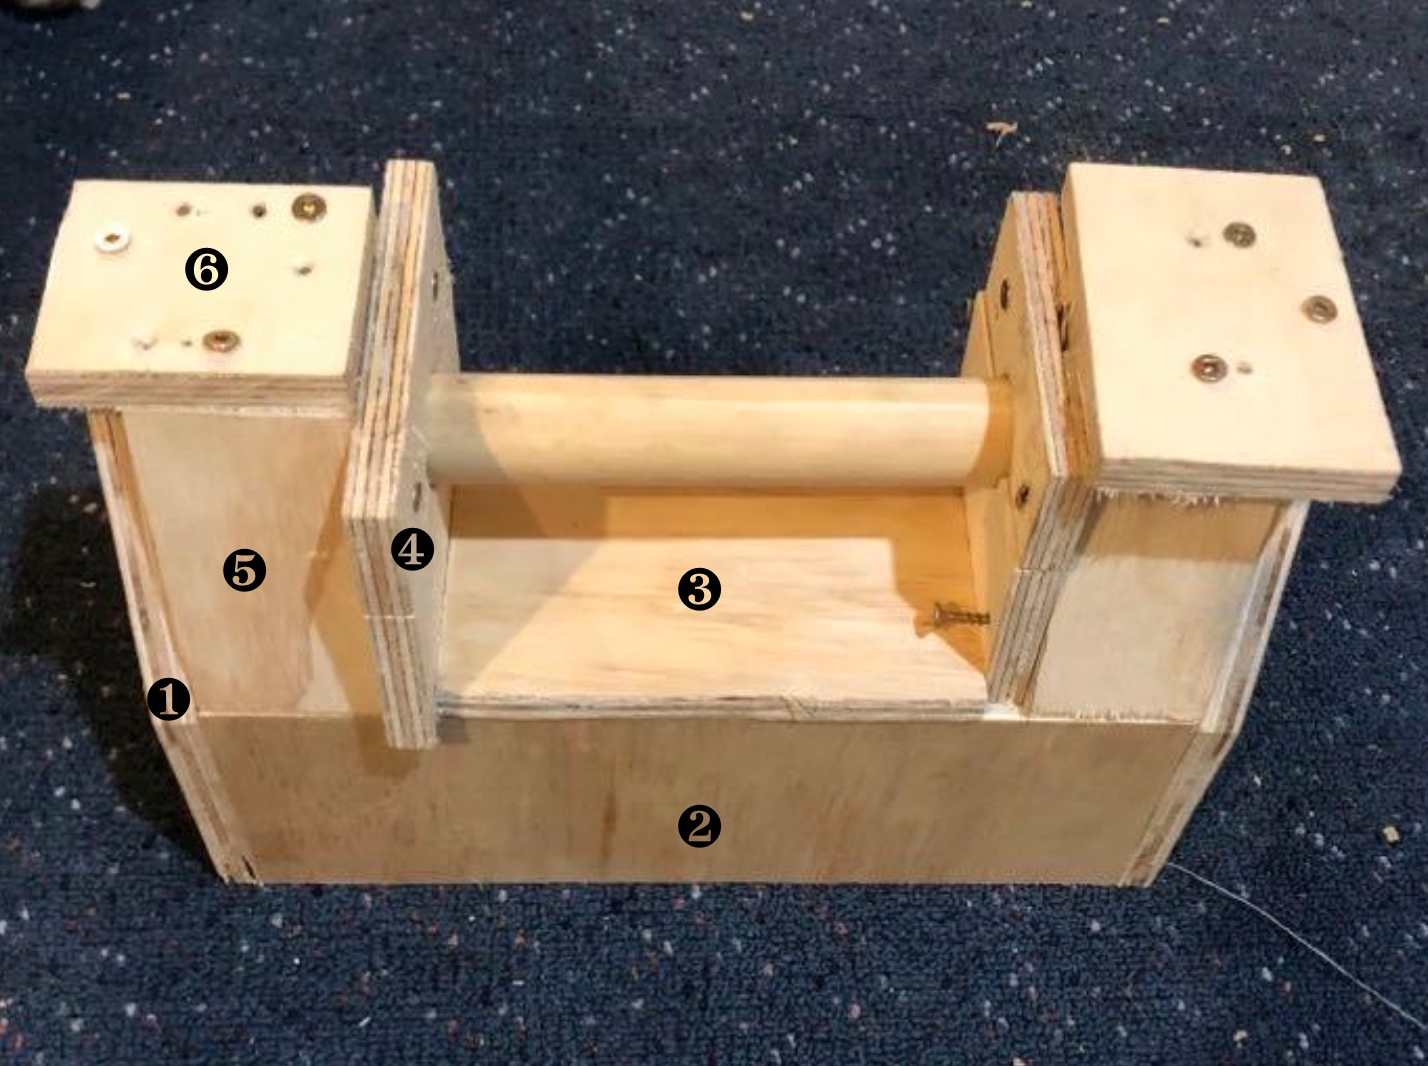
② Piece together sections ❶, ❷, and ❺ as follows:

Note: When screwing the wood together, it pays to pre-drill it so that the wood doesn’t split.
③ Join up the other side using the same sections. Split section ❹ in half horizontally (see dotted line in materials section) and add the top half as shown in the photo below. Finally add section ❻ on top.

④ Next, take your wooden pole and insert a screw vertically into either end. Twist wire around them in a square shape to create a handle-like formation like so:
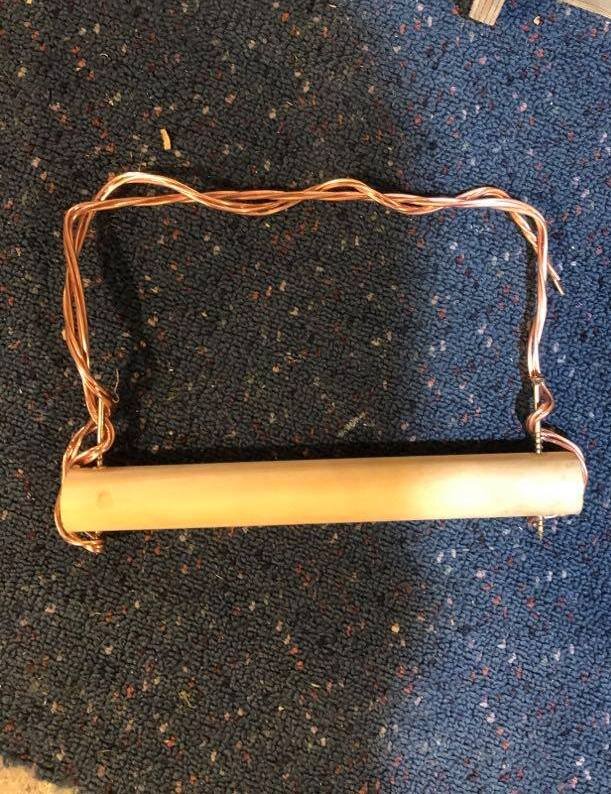
Note: The wire is to help strengthen the concrete.
⑤ Turn your mould upside down and insert the handle in the centre.
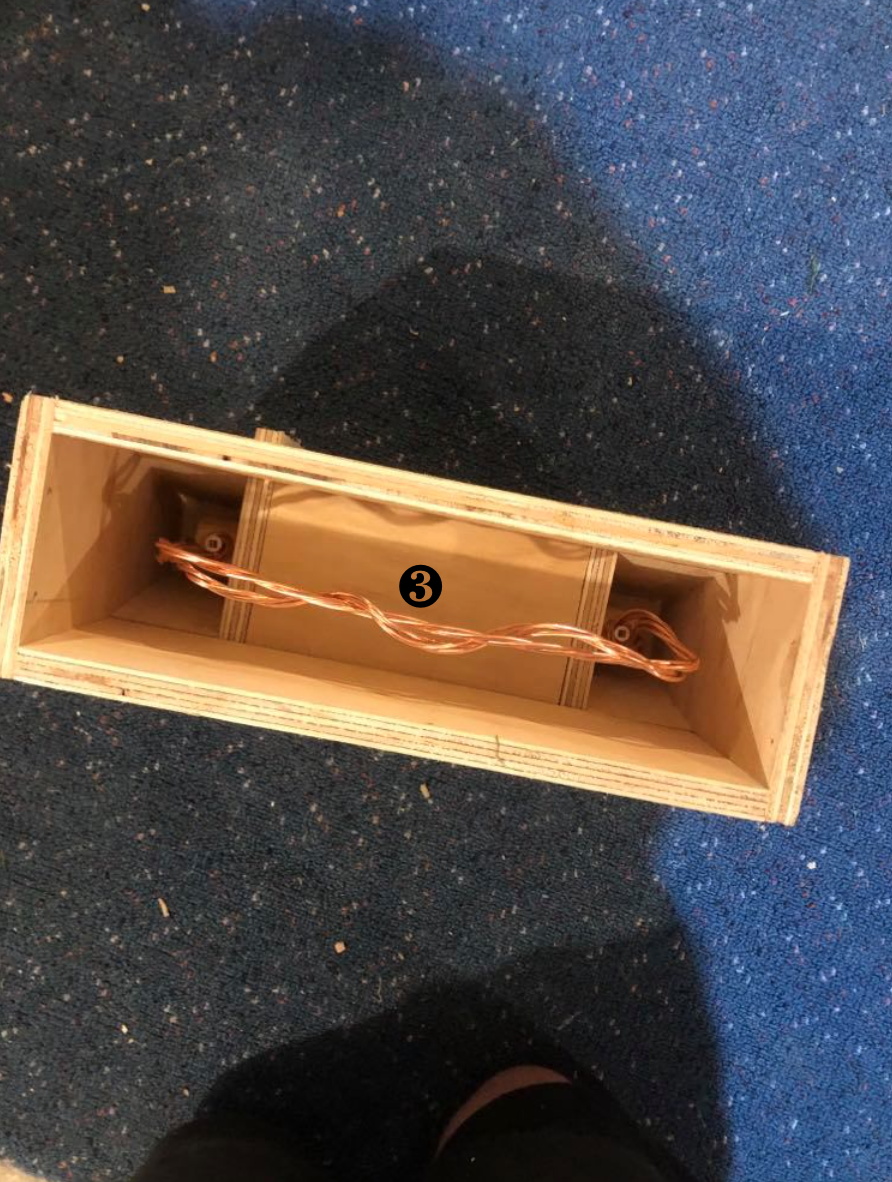
⑥ Add the bottom half of section ❹ to each side, locking the handle in place. Seal off the gap between the pole and wire with section ❸ of the wood to complete the mould like so:
You will (should!) be left with the following completed mould:
Note: You really only need to think about the inside shape, and this is what the final product will look like. Even if the outside is oddly shaped, so long as the inside is neat and the joints tightly sealed, you will produce a nice ishi-sashi.
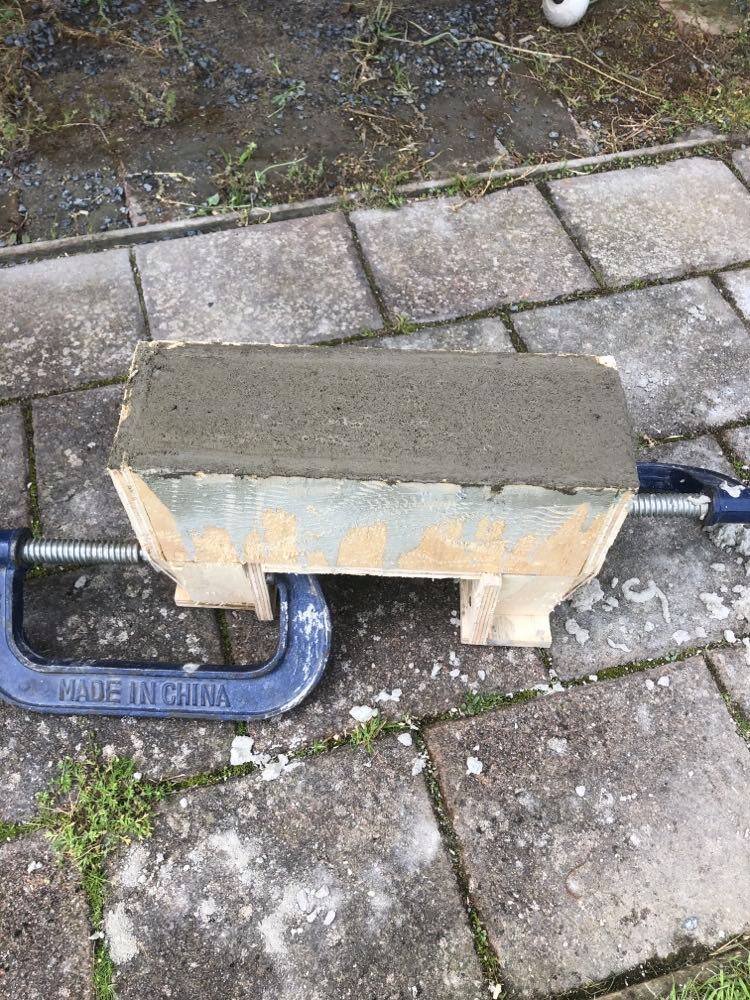
⑦ Mix the concrete according to the instructions on the bag, and pour into the mould.
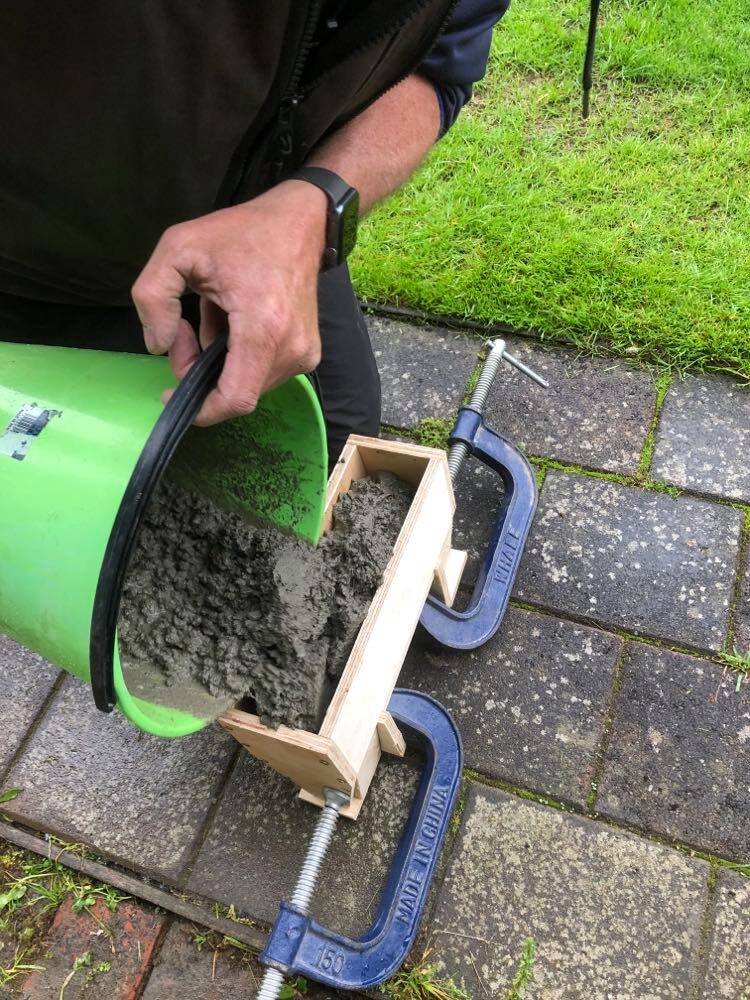
Note: It is better if the concrete is slightly wetter than normal so that it fills all the gaps right to the bottom of the mould.
⑧ Allow to dry fully (48 hours is best).
⑨ Remove the wooden mould from around the concrete to produce your final product.

Note: Any gaps/holes left after the mould has ben removed can be filled with plaster.
⑩ Sand off any rough parts (particularly along the edges that may have contact with your wrist while holding them in certain ways).
⑪ For an added (optional) aesthetic touch, place some rope at the end of the pole where it meets the concrete, and hold it in place with glue or silicone.

⑫ Start training.
